
1. Introduction
CircuitPython is a programming language with support for a wide range of microcontroller boards and sensors, including Spresense.
Follow this Getting Started Guide to set up and start using CircuitPython on your Spresense board.
2. Installing CircuitPython on Spresense
This section describes how to download and deploy CircuitPython to your Spresense board on a PC using Linux/Windows/Mac OS X.
If you have not used Spresense before, you need to:
-
Install drivers for Spresense on your PC
-
Flash the Spresense board bootloader to your board
To install CircuitPython on Spresense:
| You also need a USB cable to connect Spresense and the PC. |
2.1. Install drivers for Spresense
If you have not used Spresense on your PC before, you might need to install additional drivers. Install the driver for your OS:
-
Linux: no additional driver is needed for Linux
-
Windows 11: Install the USB serial driver CP210x USB to serial driver (v11.1.0) for Windows 11
-
Mac OS X: Install the USB serial driver CP210x USB to serial driver for Mac OS X
| If you use the latest Silicon Labs driver (v11.2.0) in Windows 11 environment, USB communication may cause an error and it may fail to flash the program. Please download v11.1.0 from the above URL and install it. |
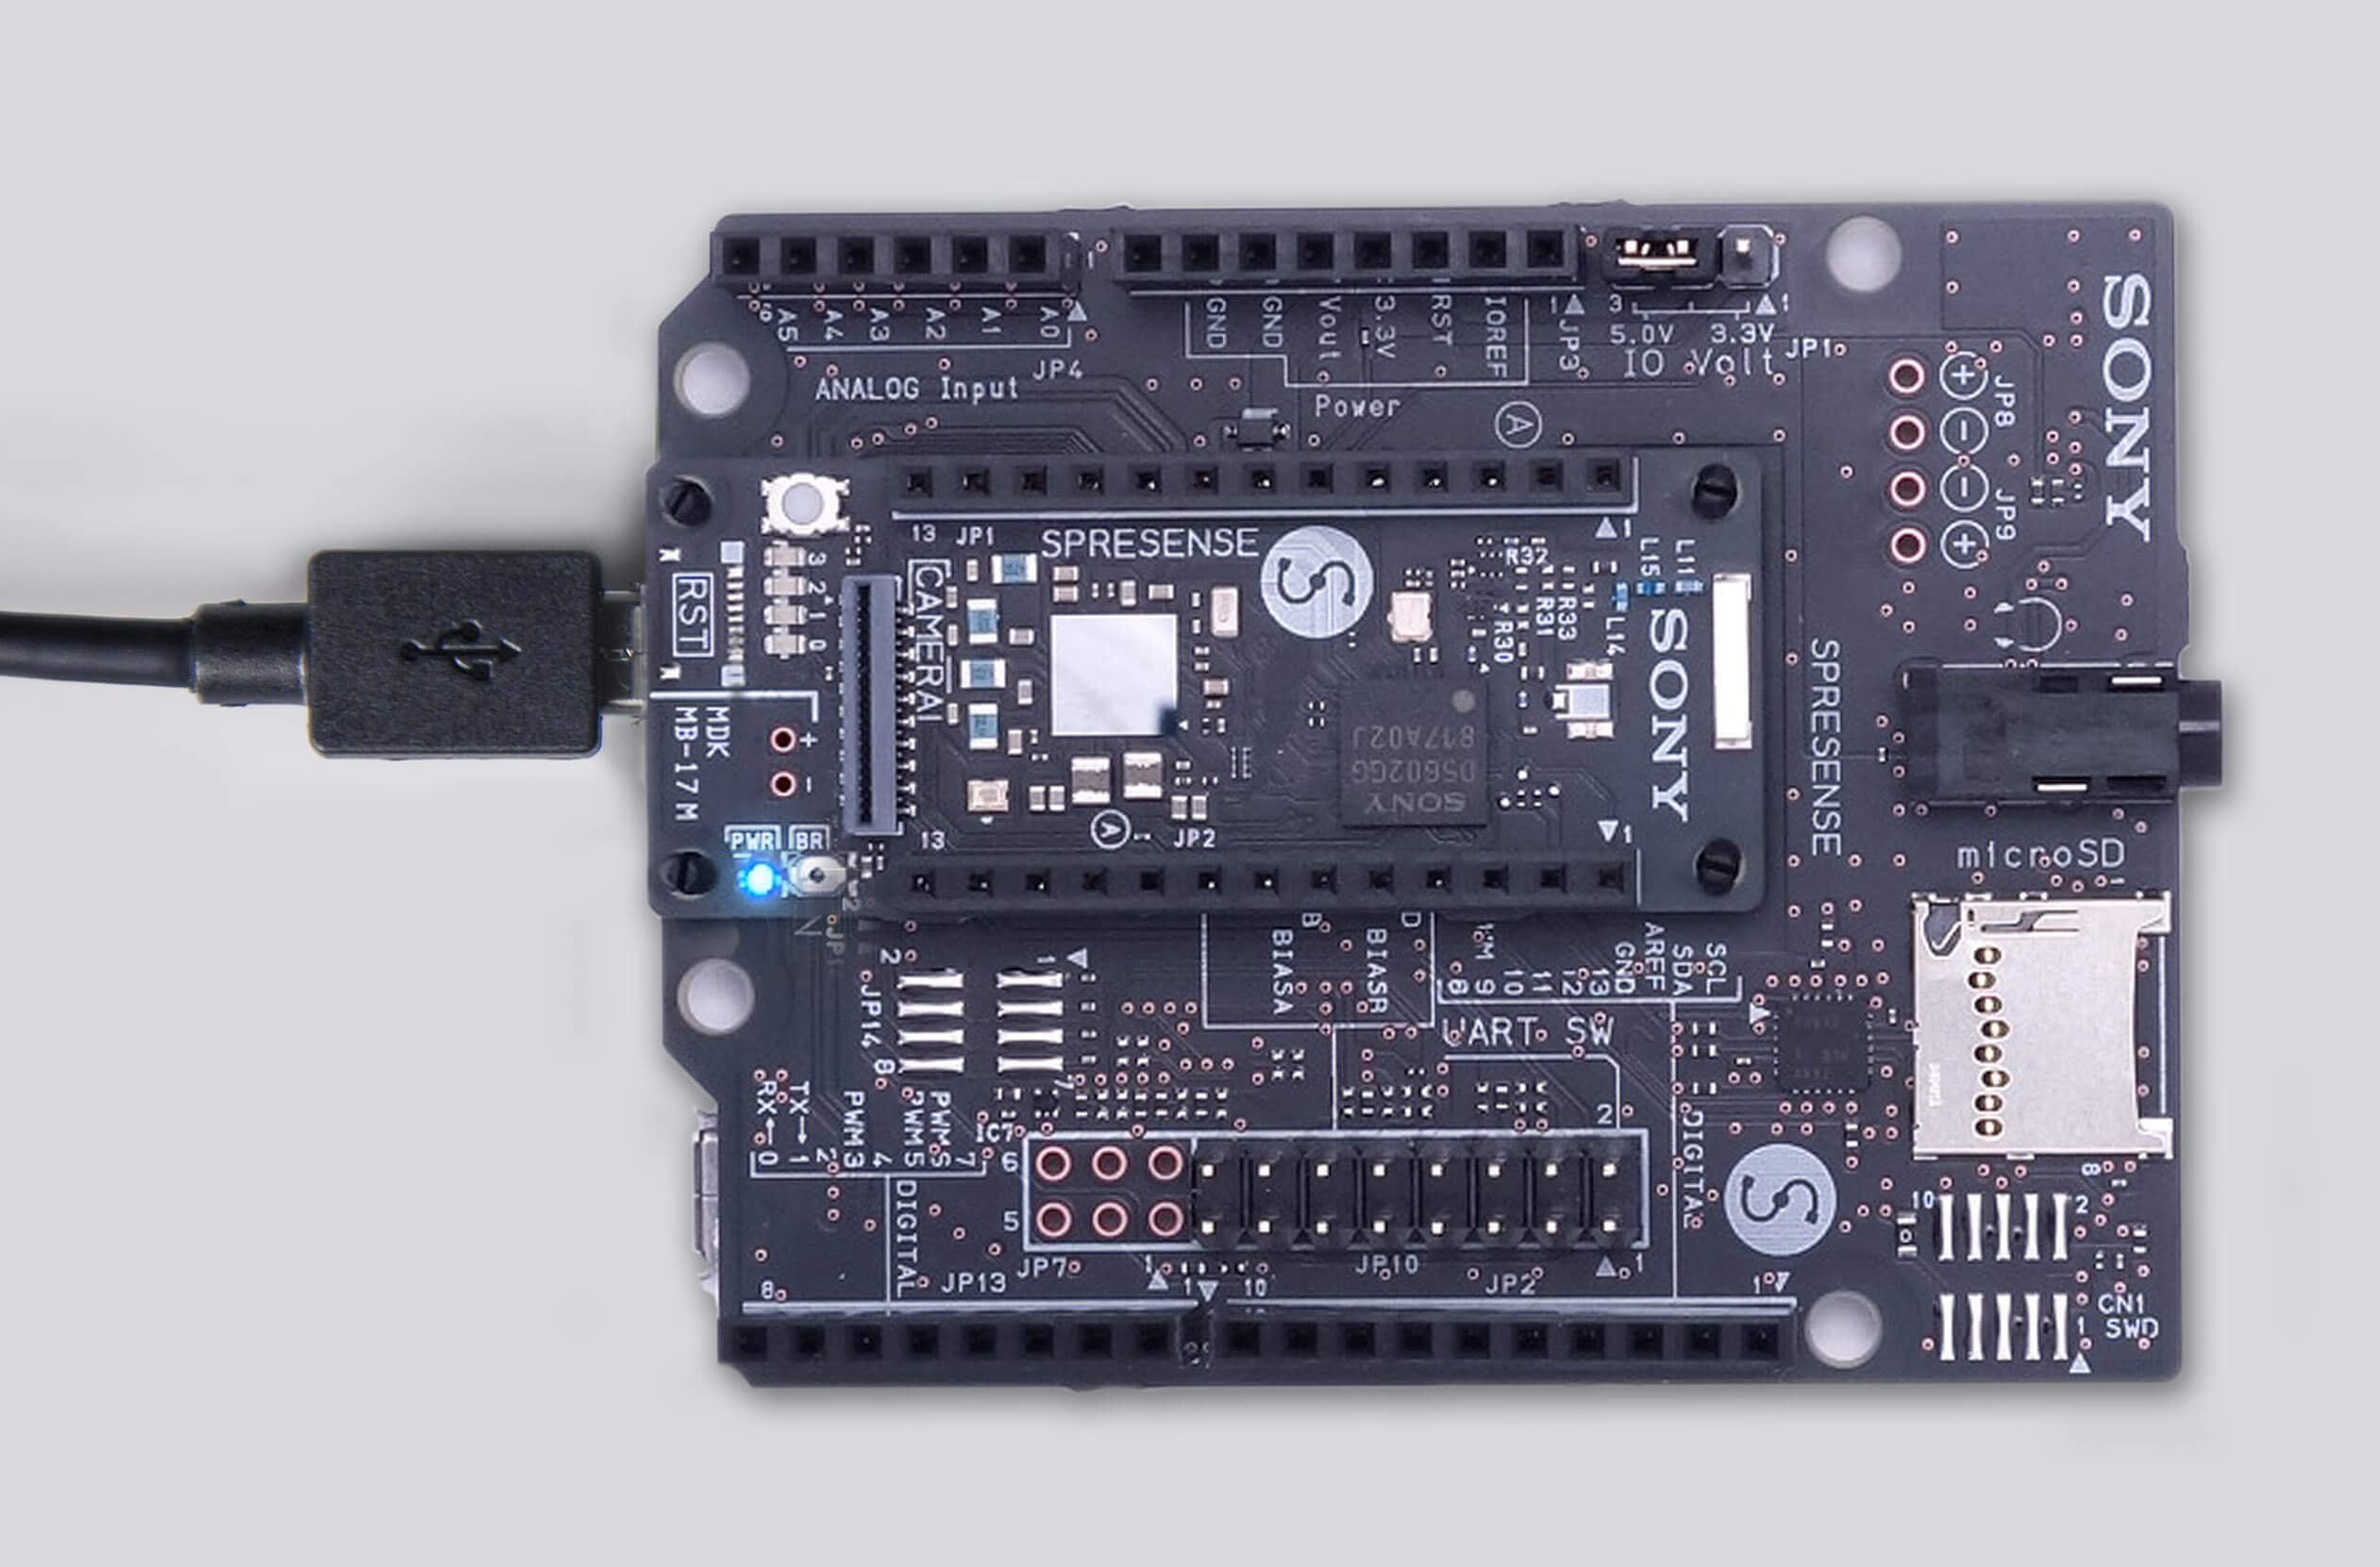
2.2. Connect the Spresense main board to the PC
-
Connect the Spresense main board to the PC using the USB cable. This provides power to the main board and allows serial communication to flash the bootloader and CircuitPython image.

-
Check the serial port name. The serial port name is different on each OS.
-
Linux:
dmesg | grep "cp21.*attached"
[12220.625979] usb 1-1: cp210x converter now attached to ttyUSB0
In this example, the port name is
/dev/ttyUSB0. -
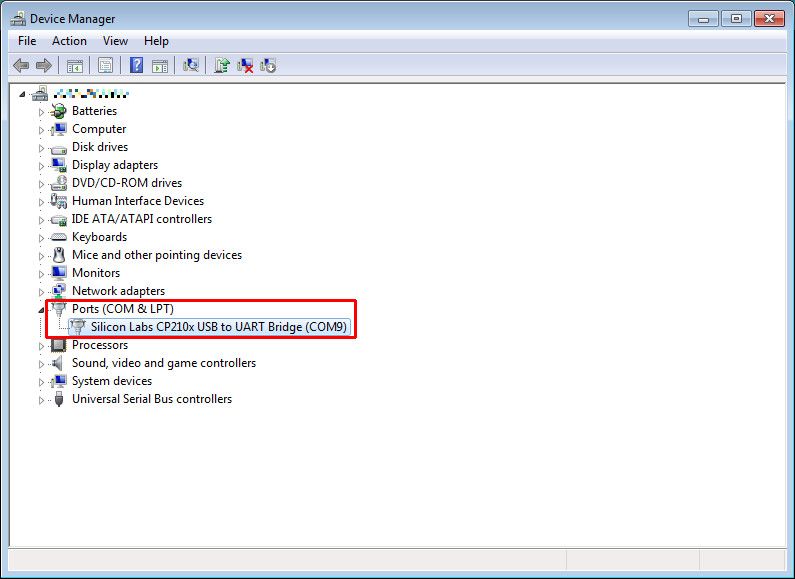
Windows 11:
Open
Settings>Devices, and Spresense board will be shown in theOther deviceslist likeSilicon Labs CP210x USB to UART Bridge (COM9). In this example, the port name isCOM9.Alternatively, you can check it from
Device Manager:
In this example, the port name is
COM9. -
Mac OS X:
ls /dev/{tty,cu}.*
/dev/cu.SLAB_USBtoUART  /dev/tty.SLAB_USBtoUART
In this example, the port name is
/dev/tty.SLAB_USBtoUART.
-
2.3. Flash the Spresense board bootloader
You need to flash the bootloader the first time you use Spresense.
| If you already flashed the bootloader to your Spresense board, you can skip ahead to Flash the CircuitPython image to Spresense. |
-
Create or choose a folder to use as your working folder.
-
Download the Spresense binaries zip archive from Spresense firmware v2-3-000 to your working folder.
-
Download the flash writer tool for your OS to your working folder:
-
Linux: flash_writer for Linux
-
Windows 11: flash_writer.exe for Windows 11
-
Mac OS X: flash_writer for Mac OS X
-
-
Use the following commands for your OS to unzip and flash the bootloader to your board:
Swap the serial port name <serial_port>in the commands below for the actual port name on your PC.-
Linux:
chmod 755 flash_writerunzip spresense-binaries-v2.3.0.zip./flash_writer -s -c <serial_port> -b 115200 -d -n "./loader.espk" "./gnssfw.espk" "./dnnrt-mp.espk" "./AESM.espk" -
Windows 11:
powershell expand-archive spresense-binaries-v2.3.0.zip .flash_writer.exe -s -c <serial_port> -b 115200 -d -n "./loader.espk" "./gnssfw.espk" "./dnnrt-mp.espk" "./AESM.espk" -
Mac OS X:
chmod 755 flash_writerunzip spresense-binaries-v2.3.0.zip./flash_writer -s -c <serial_port> -b 115200 -d -n "./loader.espk" "./gnssfw.espk" "./dnnrt-mp.espk" "./AESM.espk"
-
2.4. Flash the CircuitPython image to Spresense
-
Create or choose a folder to use as your working folder. If you have just flashed the bootloader, then use the same working folder.
-
Download the latest CircuitPython SPK for Spresense from the CircuitPython Spresense page to your working folder. Note the name of the downloaded SPK file.
-
If you didn’t download the flash writer tool earlier, download it now to your working folder:
-
Linux: flash_writer for Linux
-
Windows 11: flash_writer.exe for Windows 11
-
Mac OS X: flash_writer for Mac OS X
-
-
Use the following command for your OS to flash the CircuitPython SPK to your board:
Swap the serial port name <serial_port>in the commands below for the actual port name on your PC. Swap the correct name of the downloaded CircuitPython SPK file<downloaded_SPK>in the commands below.-
Linux:
./flash_writer -s -c <serial_port> -b 115200 -d -n "./<downloaded_SPK>" -
Windows 11:
flash_writer.exe -s -c <serial_port> -b 115200 -d -n "./<downloaded_SPK>" -
Mac OS X:
./flash_writer -s -c <serial_port> -b 115200 -d -n "./<downloaded_SPK>"
-
3. Accessing CircuitPython on Spresense
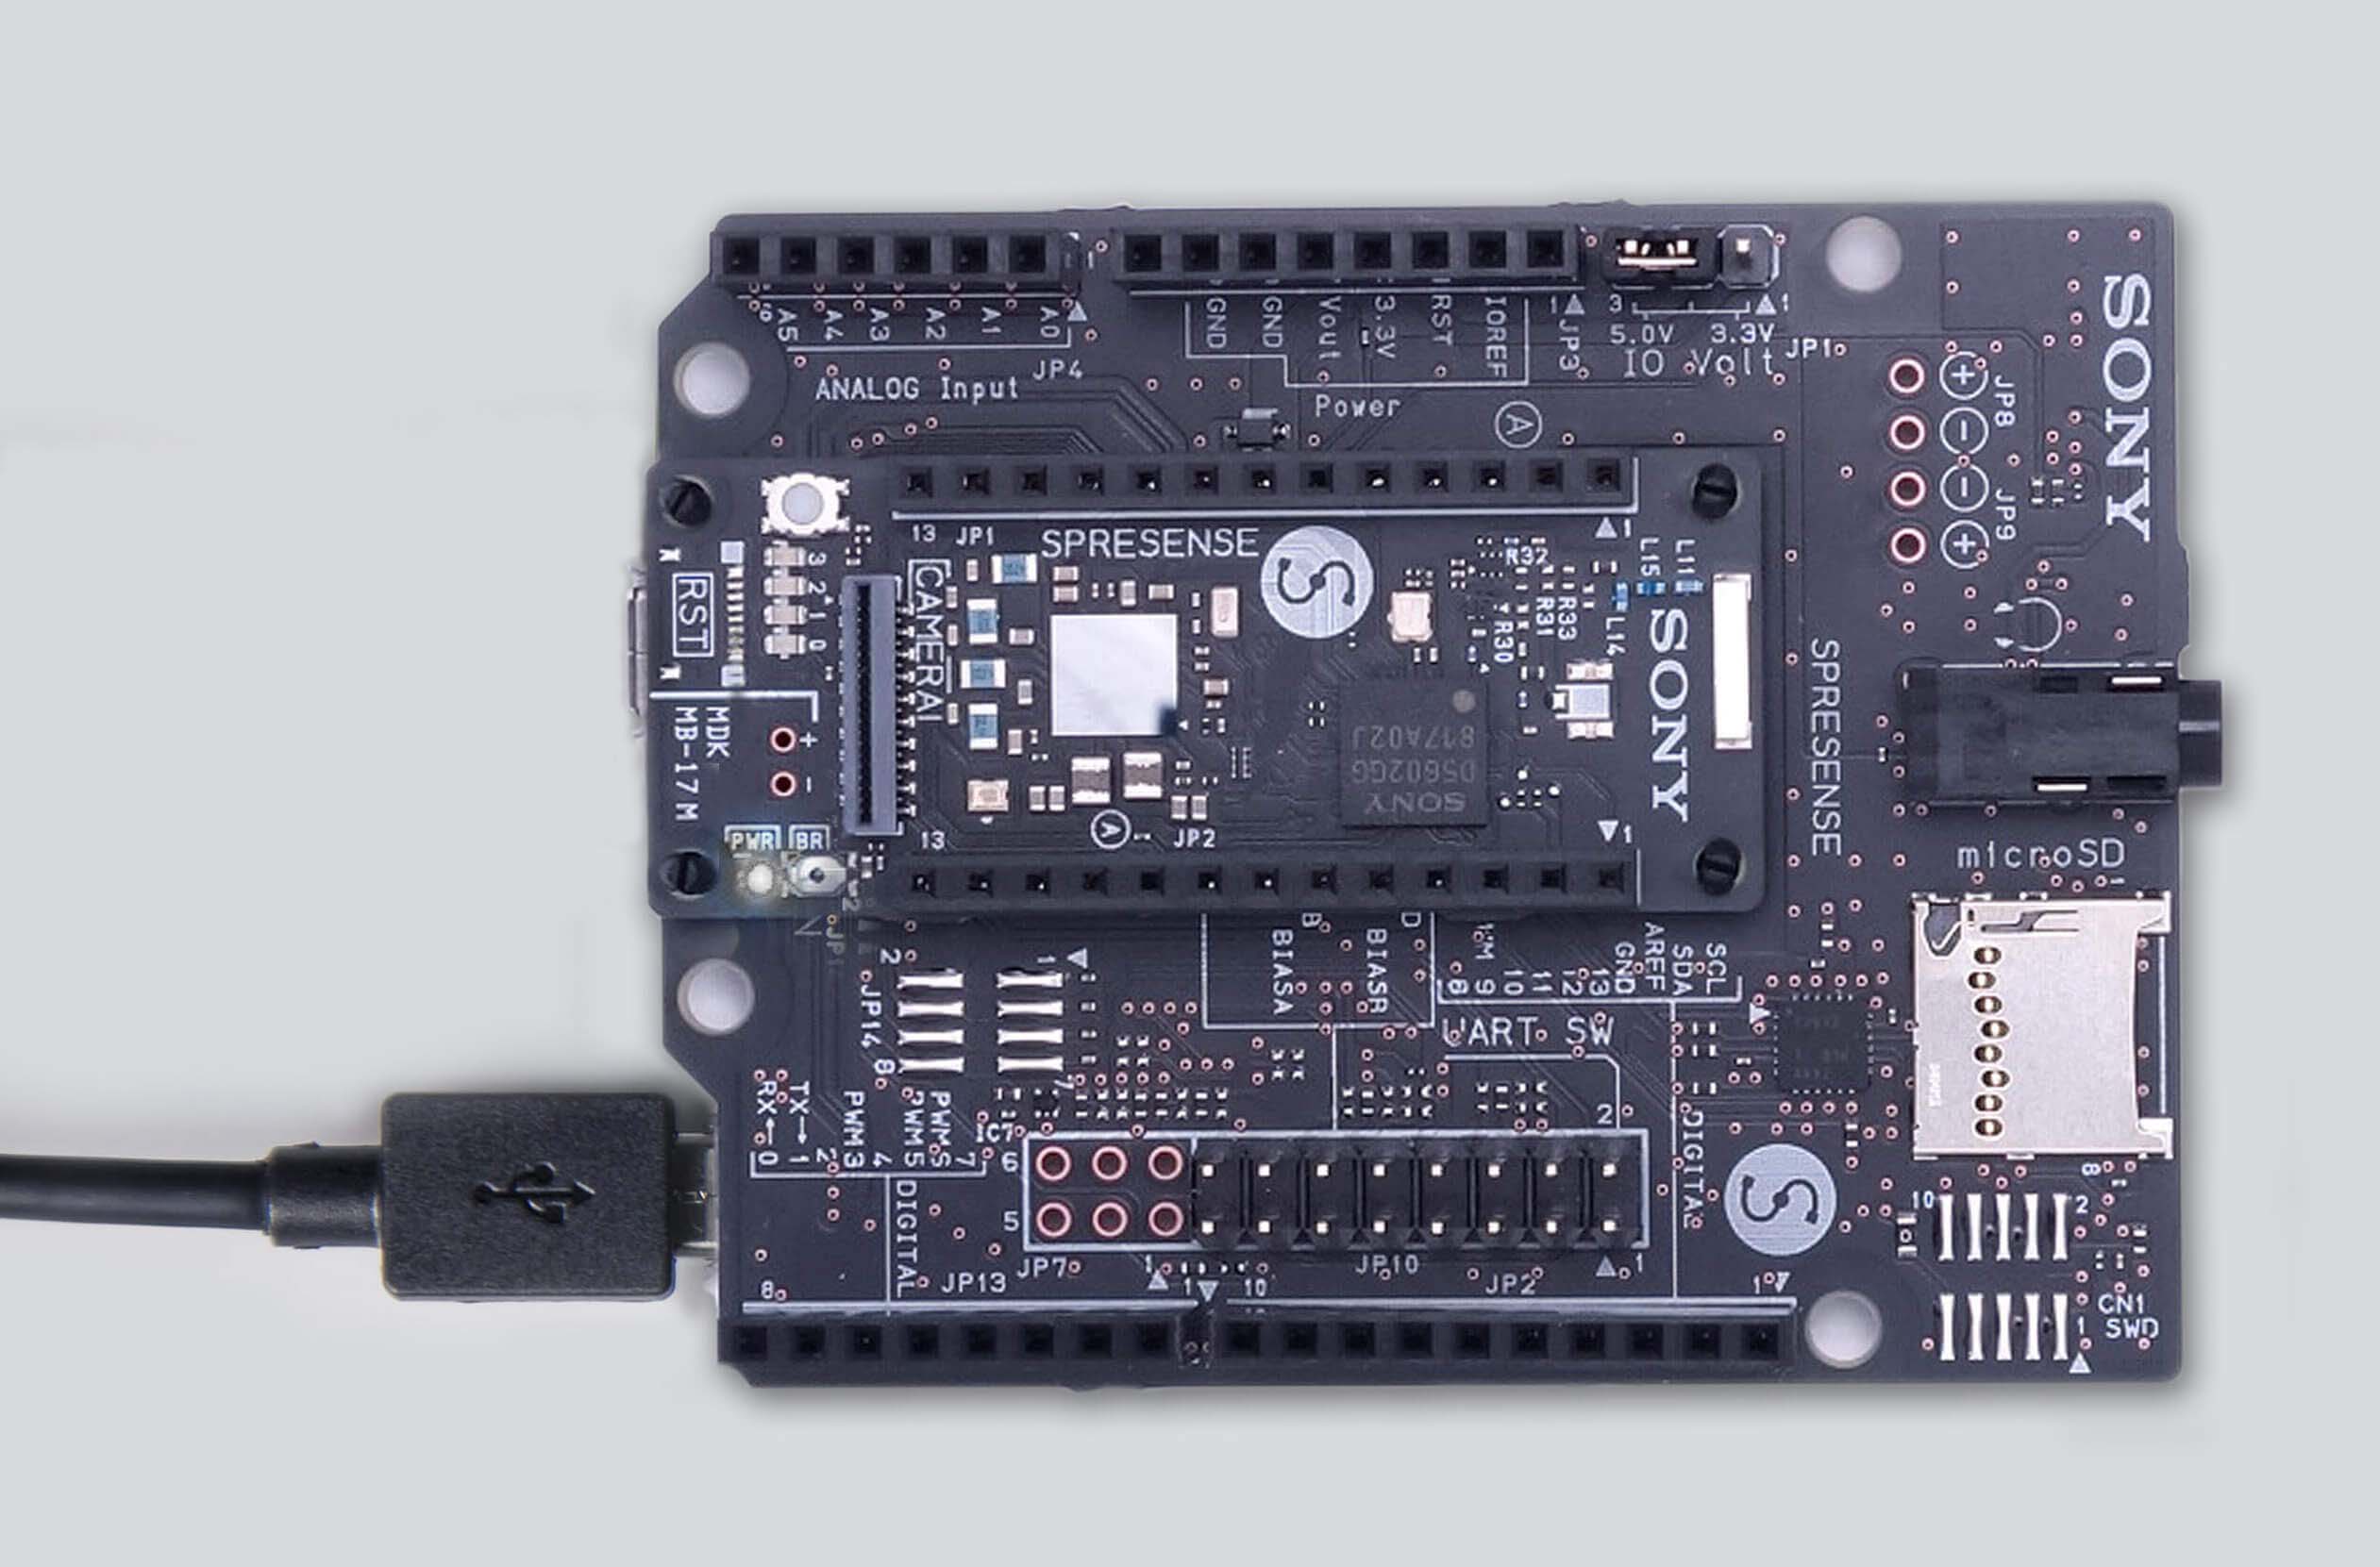
-
Connect the Spresense extension board to the PC using the USB cable, to power the system and allow serial communication to access CircuitPython.
You can reconnect the same USB cable or use a second USB cable to connect the Spresense extension board and the PC. 
-
Once built and deployed, access the CircuitPython REPL (the Python command prompt) on Spresense from your PC using the serial console via USB. Use, for example:
screen /dev/ttyACM0 115200From here on out, you’re ready to go! But, to make things even easier, the next sections cover using the
CIRCUITPYdrive on your Spresense board and CircuitPython programming with the simple code editor Mu.
4. Using the CIRCUITPY drive
After flashing CircuitPython to your Spresense board, when you plug it in to a PC, the Spresense board will be shown as an USB drive called CIRCUITPY.
Connect the Spresense extension board to the PC using the USB cable.
Store your code with necessary libraries and files in this drive.
You can edit your code directly on this drive and when you save it, it will run automatically.
When you create and edit code, save your code in a code.py file located on the CIRCUITPY drive.
You can rename the CIRCUITPY drive, for example, if you are working with multiple devices.
CircuitPython looks for code.py and runs the contents of the file automatically when the board starts up, reloads, or when you save changes to the file.
5. Installing the Mu code editor
Mu is a simple code editor that works with CircuitPython boards. It’s written in Python and works on Windows, MacOS, Linux, and Raspberry Pi. The serial console is built right in so you get immediate feedback from your board’s serial output!
5.1. Download and Install Mu
Download Mu from: https://codewith.mu. Click the "Download" or "Start Here" links there for downloads and installation instructions. The website has a wealth of other information, including extensive tutorials and and how-to’s.
5.2. Using Mu
Mu attempts to auto-detect your board, so please plug in your Spresense board and make sure it shows up as a CIRCUITPY drive before starting Mu.
The first time you start Mu, you will be prompted to select your "mode". Select "CircuitPython".
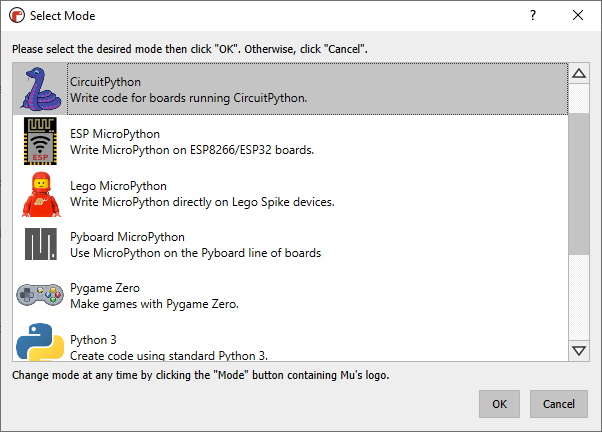
The current mode is displayed in the lower right corner of the window, next to the "gear" icon. If the mode says "Microbit" or something else, click on the "Mode" icon in the toolbar and then choose "CircuitPython" in the dialog box that appears.
Now you’re ready to code!
6. Creating and editing code
If you don’t or can’t use Mu, there are basic text editors built into every operating system such as Notepad on Windows, TextEdit on Mac, and gedit on Linux. However, many of these editors don’t write back changes immediately to files that you edit. That can cause problems when using CircuitPython. See the Editing Code section below. If you want to skip that section for now, make sure you do "Eject" or "Safe Remove" on Windows or "sync" on Linux after writing a file if you aren’t using Mu. (This is not a problem on MacOS.)
6.1. Creating code
-
Open your editor, and create a new file. If you are using Mu, click the New button in the top left.

-
Copy and paste the following code into your editor:
import board
import digitalio
import time

led = digitalio.DigitalInOut(board.LED0)
led.direction = digitalio.Direction.OUTPUT

while True:
    led.value = True
    time.sleep(0.5)
    led.value = False
    time.sleep(0.5)
It will look like this - note that under the
while True:line, the next four lines have spaces to indent them, but they’re indented exactly the same amount. All other lines have no spaces before the text.
-
Save this file as
code.pyon yourCIRCUITPYdrive.The green LED on your Spresense board should now be blinking, once per second.
Congratulations, you’ve just run your first CircuitPython program!


6.2. Editing code
To edit code, open ("Load") the code.py file on your CIRCUITPY drive into your editor.
Make the desired changes to your code, and save the file again. That’s it!
Your code changes are run as soon as the file is done saving.
| Do not unplug your Spresense board before your file is saved. |
The CircuitPython code on your board detects when the files are changed or written and will automatically re-start your code. This makes coding very fast because you save, and it re-runs.
However, you must wait until the file is done being saved before unplugging or resetting your board! On Windows using some editors this can sometimes take up to 90 seconds, and on Linux it can take 30 seconds to complete, because the text editor does not save the file completely. Mac OS does not seem to have this delay.
This is really important to be aware of. If you unplug or reset the board before your computer finishes writing the file to your board, you can corrupt the drive. If this happens, you may lose the code you’ve written, so it’s important to backup your code to your computer regularly.
One way around this on Windows is to "Eject" or "Safe Remove" the CIRCUITPY drive.
It won’t actually eject, but it will force the operating system to save your file to disk.
On Linux, use the sync command in a terminal to force the write to disk.
6.3. Exploring your first CircuitPython program
Let’s take a look at the different parts of our sample program.
6.3.1. Imports and libraries
Each CircuitPython program you run needs to have a lot of information to work.
The reason CircuitPython is so simple to use is that most of that information is stored in other files and works in the background.
These files are called libraries.
Some of them are built into CircuitPython.
Others are stored on your CIRCUITPY drive in a folder called lib.
import board
import digitalio
import time
The import statements tells the board that you’re going to use a particular library in your code.
In this example, we imported three libraries: board, digitalio, and time.
All three of these libraries are built into CircuitPython, so no separate files are needed.
That’s one of the things that makes this an excellent first example.
You don’t need any thing extra to make it work!
board gives you access to the hardware on your board, digitalio lets you access that hardware as inputs/outputs and time let’s you pass time by 'sleeping'.
6.3.2. Setting up the LED
The next two lines setup the code to use the LED.
led = digitalio.DigitalInOut(board.LED0)
led.direction = digitalio.Direction.OUTPUT
Your Spresense board knows the LED as LED0.
So, we initialize that pin, and we set it to output.
We set led to equal the rest of that information so we don’t have to type it all out again later in our code.
6.3.3. Loops
The third section starts with a while statement.
while True: essentially means, "forever do the following:".
while True: creates a loop.
Code will loop "while" the condition is "true" (vs. false), and as True is never False, the code will loop forever.
All code that is indented under while True: is "inside" the loop.
Inside our loop, we have four items:
while True:
    led.value = True
    time.sleep(0.5)
    led.value = False
    time.sleep(0.5)
First, we have led.value = True.
This line tells the LED to turn on.
On the next line, we have time.sleep(0.5).
This line is telling CircuitPython to pause running code for 0.5 seconds.
Since this is between turning the LED on and off, the LED will be on for 0.5 seconds.
The next two lines are similar.
led.value = False tells the LED to turn off, and time.sleep(0.5) tells CircuitPython to pause for another 0.5 seconds.
This occurs between turning the LED off and back on so the LED will be off for 0.5 seconds too.
Then the loop will begin again, and continue to do so as long as the code is running!
If you don’t have a loop, the code will run to the end and exit. This can lead to some unexpected behavior in simple programs like this, since the "exit" also resets the state of the hardware. This is a different behavior than running commands via REPL. So if you are writing a simple program that doesn’t seem to work, you may need to add a loop to the end so the program doesn’t exit.
The simplest loop would be:
while True:
    pass
And remember - you can press <CTRL> + <C> to exit the loop.
6.4. Naming your program file
CircuitPython looks for a code file on the board to run. There are four options:
-
code.txt -
code.py -
main.txt -
main.py
CircuitPython looks for these files, in this order, and then runs the first one it finds.
While we suggest using code.py as your code file, it is important to know that the other options exist.
If your program doesn’t seem to be updating as you work, make sure you haven’t created another code file that’s being read instead of the one you’re working on.
6.5. Switching your development environment
In the unlikely case that you want to switch your Spresense development environment from CircuitPython to something else, you might need to make some preparations on Spresense.
CircuitPython on Spresense uses the FAT file system, and both the Spresense SDK and Spresense Arduino Library use Smart FS. When switching to a new development environment, you may need to reformat the Spresense SPI flash file system.
| You do not need to reformat Spresense if you are switching from some other development environment to CircuitPython. It will be reformatted automatically, if necessary. |
6.5.1. Switching to the Spresense SDK
If you want to switch from CircuitPython to the Spresense SDK, you can use the mksmartfs command at the NuttShell command prompt.
- Example
nsh> mksmartfs -s 4096 -f /dev/smart0d1 1
Restart your Spresense when it’s done, and you’re ready to go.
6.5.2. Switching to the Spresense Arduino Library
If you want to switch from CircuitPython to the Spresense Arduino Library:
-
Download the nuttx_shell sketch from the spresense-sketches GitHub repository. This sketch provides access to the Nuttx Shell.
-
Open the files in the Arduino IDE and upload them to Spresense.
-
In the Serial Monitor or another terminal emulator, use the
mksmartfscommand at the NuttShell command prompt.- Example
-
nsh> mksmartfs -s 4096 -f /dev/smart0d1 1
-
Restart your Spresense when it’s done, and you’re ready to go.